Saturday, 27 February 2016

Step 3. A 'How to' guide to becoming your own MUA

Step 1 & 2 done it's time to finish off your face. At this stage you should have applied your primer and foundation to the most part of your face. You are now ready for the concealer. I want to point out that this series of tutorials is all about perfecting your makeup to achieve a natural flawless daytime look, if you can master this look then the rest will follow. Many people think that a natural look is very simple but often it can be the hardest look to achieve. You need the right amount of product to cover and conceal any imperfections on your skin without leaving your skin looking caked and loaded with product. The balance can often be hard to achieve. 
Hopefully by the end of this series you'll have mastered this art.
Liquid Concealer: For use around the eye area and to highlight the face
You should always use a liquid concealer for these areas as a cream concealer is too thick and will settle into the fine skin around your eye area ageing you. As a rule of thumb you should use a liquid concealer for your eye area and highlight at least 2-3 times paler than your foundation. I often just go for the palest shade that I can find in whichever my chosen liquid concealer is. At the moment I am using and loving a Catrice concealer  (Liquid Camouflage in 010 Porcelain) I picked up in penny's for under a fiver.
Using either the wand provided or a concealer brush apply this under your eye area in a v-shape sweeping it along the higher part of your cheekbone too. This will create a v of light which will brighten your face instantly. Apply a small amount on your lids too. Using either a clean small fluffy brush or your beauty blender, gently blend the concealer right up under your lower lash line, along the lid up as far as your brow and into the foundation under the eye and along the cheekbone. Do this on both sides obviously. Depending on your face shape you will want to highlight certain parts of your face. Generally speaking an oval face is the most desired shape to have. By highlighting certain areas on your face you can bring forward facial features using the light from your concealer.

A quick guide to highlighting and contouring to achieve the "perfect" oval shape is as follows.
(We will get to shading or contouring in the next step just concentrate on the highlight for the moment).
Oval: Shade the cheeks
Square: Shade the temples and the jawline
Round: Highlight the chin, shade the cheeks
Diamond: Highlight the temples and jawline, shade the chin and top of the forehead
Long: Shade the forehead, cheekbones and the chin. Highlight the jawline.
Heart: Shade the temples, cheeks and chin. Highlight the jawline.
Pear: Highlight the temples and chin, shade the jaw.

To elongate, shorten or narrow the nose the following rules apply.
Long nose: Shade the tip
Short nose: Highlight down the bridge of the nose
Wide nose: Shade down the length of each side of the nose

If you are getting confused about where to apply the liquid concealer to highlight just think of how you can make your face more oval shaped. Do you have narrow temples, highlight these that will bring them forward. A small chin, highlight, thin jawline, highlight and so on. Remember light brings forward, shade pushes back.

Once you have placed the concealer in the correct positions for your face gently blend it in. You only want to use a small amount of product here. This is not being used to conceal imperfections rather to perfect your face shape. Loading product on will only result in a heavy unflattering finish to your makeup.

Cream concealer: For concealing blemishes and imperfections
Always use a cream concealer for any blemishes or imperfections in the exact shade of your foundation. You may need to have one or two different shades cream concealers in your bag to match your foundation depending on the time of the year or if you wear slightly darker foundation on a night out. The reason you use cream concealer rather than a liquid one is simple. Liquid concealers are lighter in consistency and will slide off your face more easily resulting in the blemish or imperfection you were looking to cover being exposed. Again you do not need to spend a lot of money on a cream concealer, most pharmacies or supermarkets stock a range of cream concealer palettes. In fact Essence do another great little palette with two shades which you can blend together to get the right colour match for your skin called Match to Cover. Be very light handed when using this type of concealer. If you load too much product on the area you want covered you will end up drawing more attention to it. Matching it to your foundation is key otherwise it will either look too dark on your face or too bright drawing the eye to it, which is exactly what you don't want.
Use a small concealer brush to apply and blend using patting motions either with your finger or beauty blender.

Once all your concealer has been applied it's time to lock in all that hard work. Use a large soft power brush to dust a small amount of translucent powder along the areas that need setting. Dip your brush into the powder but knock of the excess. The last thing you want to do is end up with too much powder sitting on top of your face. If you have dry skin just apply this to the areas you feel need setting, likewise if you have fine hairs on your face don't overload with powder as it will sit on top of the hairs. To set the eye area either use your translucent powder or a cream matte eyeshadow using a small clean fluffy brush, a powder brush is too big for this delicate area. Usually I would say you don't need to spend too much on products to achieve a great look, I will say though it's very hard to come across a decent colourless translucent powder unless you go for professional make up brands. Inglot, MAC and Makeup forever do a really good setting powder just ask the counter girls and they can advise you on the one to buy. Stay clear of powders with talc in them or with any kind of colour, you really want the be buying a pure white preferably loose finishing powder.


Contour, blush and illuminator:
We are getting there, slowly but surely! The finishing touches for the perfect face (eye and lips excluded here obviously).
Look back on the basics of achieving the perfect face shape above and apply these principles. If you are lucky enough to have an oval shaped face (think Kim Kardashian) then you will only really need to lightly contour the cheeks. You do not need to contour at all, infact ditching the contour and concentrating on just highlight and illuminating the face is becoming increasingly popular especially with the summer coming in. I do know however many people struggle with contouring and where to place it so I've included it here.
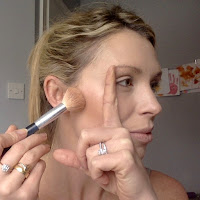
When choosing your contour shade always use a matte finish, anything with a shimmer in it will not look natural.  A great little 3 in 1 palette which includes your contour, blush and illuminator is the Naked Urban Decay Flushed one, Sleek do an excellent dupe of this which is available in Boots I think for about €12.00. Both come in a lighter and darker shade range. I use the lighter shade  as my skin is fair through the winter. Use a small angled blush brush to apply your contour as this will allow you to be more precise. When applying your shader to the cheek area first using your index finger find the nook under your cheekbone. You want to place your contour just under this area. Starting from the ear using light feathery strokes and minimal product sweep the matte bronzer under the cheekbone towards the nose just as far as the outer corner of your eye. If you use your index finger again place it on the outer corner of your eye finger pointing upwards you will see how far in your contour should be going. Its quite a small area, many people make the mistake of swiping it too far in their face resulting in a a very harsh contour which is unflattering. Apply the contour as per the guide above in the concealer section or if this is confusing you a good rule of thumb is the number 3. With light feather stories dust the matte bronzer in the 3 shape along each side of your face hitting the forehead/temple down  into the cheek area and then onto the outer jawline. This will add warmth and definition to your facial features. 
Blush. This is definitely a preference and some will not need to use it at all especially wis they have a natural rosiness to their cheeks already. Use a medium sized rounded fluffy brush with a very small amount of product on. Always knock off any excess, its better to start with minimal amounts and build up as desired. Smile. Where the roundest part of your cheek is is where you want to apply the blush. Us a tick or 7 motion when applying your blush. Do this once on each side and take a step back to check if you need more, the last thing you want is to end up looking like Aunt Sally or Madonna from the eighties. 

Illuminate. This is definitely my favourite part of the look. The difference a little bit of illuminator can make is shocking. Apply your illuminator along the tops of your cheekbones, cupids bow (your upper lip) although if you have any fine hairs along here it's probably best to not add any more powdered product. Dust it along your brow bone and anywhere else you think the sun would naturally hit your face. It's all about creating a glow. Fresh dewy skin looks beautiful and more youthful and illuminators help you achieve this.

 So there you have it, foundation, concealer, powder, contour, blush and illuminator done. The next step is your brows which I'll post up soon. I hope this is helping you become more confident around your makeup application. If you have any comments or questions you can find me on Facebook Kelliebbeautiful or Twitter  @KellieBillings1.

Till the next time.


Thursday, 25 February 2016

Step 2: A 'How to' guide to becoming your own MUA

If you've been following my blog, you'll now know that I'm hoping to provide you guys with the tools to becoming competent and confident at doing your own makeup. My previous post was all about identifying your skin type and tone which will enable you to make an informed decision when buying your foundation. Hopefully you'll have had a chance to examine your skin either yourself or have had someone do it for you and have chosen a foundation that is
most suited to your skin type. If you're not ready to invest in a new foundation just yet, ask for some samples from various beauty counters. Most of them are great for this and will usually give you a few samples to take home. A tip if you're going to do this: Bring some tiny sample bottles yourself, sometimes counters will say they can't provide a sample as they
have no bottles left to decant their foundations into. Bring your own then they have to give you a sample. I've done this lots of times when buying new foundations, don't be embarrassed to ask it's what they are there for. My favourite counters who are really great for advice and samples are Yves Saint Laurent in House of Fraser in Dundrum and Bobbi Brown. The girls on these countered really know their stuff and are so helpful. Este Lauder are usually great too.


Once you've chosen a foundation or have a few samples it's time to get applying it.

You're first port of call is preparing your skin for your foundation. You want it to last all day on your face and honestly the only way this is going to happen is if you have prepped your face first with a good moisturiser and primer. By following these next few steps you should see the difference between slapping your makeup on in the morning in two minutes and taking just a few minutes more to apply it correctly.


Step 1. Moisturise: After washing your face in the morning and before you get dressed apply your usual daytime moisturiser this will give it enough time to absorb into your skin creating a better base for makeup application. You'll need to leave it absorb for at least ten minutes, so go get dressed or whatever else you have to do. Make sure your moisturiser is not too heavy as this will leave a film on your face and your foundation will end up sitting on top of this with the end result looking cakey.


Step 2. Prime: Always use a primer. This is so important for the longevity of your foundation. You don't need to choose an expensive one there are great ones out there for less than a tenner just stick to the same principals when choosing one as you would when choosing your foundation. You can apply this using your fingers or a makeup brush.  I like to use my fingers, you don't want to blend this into your skin as you would your foundation. With your fingers you can use a lighter touch. Smooth it over the areas you may have trouble with such as dry flaky skin or enlarges pores as this evens out the skins surface acting as a second more perfected skin layer. This ensures your foundation sits evenly on your skin. Tend to apply primer all over my face which is absolutely fine too.

Step 3. Foundation: Decant a small amount of product either onto the back of your hand or a palette but never straight onto your face. You want to be able to pick up product as needed and build up the amount of coverage you want a little at a time. Choose the tool you are most comfortable using to apply your foundation but stay clear of your fingers as the heat of your hands and excess oils often interfere with the product reducing it's longevity and coverage. Assuming you have chosen the correct colour you can start application from the inner nose working outwards and upwards blending as you go. You want to apply a thin layer of foundation first all over the face but avoid applying any around the eye area (This is where you will be applying a liquid concealer and if you have foundation there too your makeup will cake around the delicate eye area which will age you). Think sunglasses...leave a circle all around the eye area, lids and under-eye free from makeup. I'll get to this area in the next post. Check to see if the amount of coverage you want is correct. Avoid using really full coverage foundations especially if you have mature skin. The temptation is to use as full a coverage as possible but honestly this will only ever age you. A build able foundation will allow you to get a better coverage to suit you and leave your skin looking fresher, dewy and ultimately more youthful.

Foundation done, next stage is the concealer. You'll want to choose a liquid concealer in 2-3 shades lighter than your foundation for your eye area and to highlight your face. You will then need to choose a cream concealer the same shade as your foundation for any blemishes you may have
. Don't be fooled into spending lots of money here. Penney's do a great range of excellent concealers in both liquid and cream. So go pick some up or have a root in your makeup bag and we'll pick up form here tomorrow. You will also need a translucent powder, it doesn't matter if it's compact or loose but it does need to be as colourless as possible.

Till tomorrow.


Wednesday, 24 February 2016

Know the Skin You're In, Step 1: A 'How To' guide to becoming your own MUA

Being a makeup artist I assume people know a lot more about makeup than they really do. It was only when a friend of mine came to me recently and asked if I could advise her on what type of makeup she should be using did it occur to me that if someone I consider pretty "well up" on fashion and beauty needs advice from me them maybe others do too. So I've decided that my next few posts should be about makeup, how to choose it and getting the basics right with application. It's easy really to go to any makeup counter and be advised about the correct foundation for your skin type, tone etc. Every counter girl worth her salt should be able to do this correctly but not everyone knows what to do with the makeup once they get home. Sooo many people are paying money on a weekly basis to get their makeup done by a professional (like myself) when really with a little practice they could master it themselves saving that few quid for something else, like a bottle of bubbly to get ready with!

So here it goes, get the basics right and the rest will follow, trust me I'm an MUA (lol!)

Identify your skin type 
This could be considered the easy part if you go to a makeup counter to get your skin assessed. Ask the right questions and you'll come away with a wealth of knowledge you didn't even know about yourself even though it was looking you right in the face.

What skin type am I?
Oily - Is you skin shiny, thick with a firm appearance? Do you have enlarged pores?
Dry - Is your skin fine, thin and delicate? Is it easily aggravated by environmental factors such as sun, wind or chemicals?
Normal - Does your skin look soft with a healthy glow? Is it plump and dewy with minimal pores?
Combination - Is your skin any two of the above combined?

What condition is your skin in?
Is it dehydrated, mature/ageing/sensitive?

What is your skin tone?
Do you have a warm or yellow undertone to your skin? Check the veins on your wrist, if they have a green hue then you most likely have a warm undertone to your skin.
Do you have a cool or pink undertone to you skin? Again check the veins on your wrist if they are blue then you most likely have a cool undertone.
Are you neutral? Many Irish people have a cool undertone but there are a few like myself who have a neutral undertone. They are neither pale with pinkish undertones or darker with yellowish undertones.   I have both pink and yellow undertones to my skin (obviously ignoring any pink in my cheeks) and depending on the time of the year. Saying that, the best place to check your skins colour is your neck, it probably is the best reflection of your true skin tone, once its not covered in fake tan.

Once you have either answered all of these questions yourself or been advised by a someone who knows what they are talking about you are ready to buy your foundation and primer.

Seems like a lot of work doesn't it? but really it's worth getting it right, you'll at least be able to make an informed decision when buying  your makeup, whether it's from the advice of a counter girl or you're picking some up yourself from the local pharmacy or supermarket.

Tools of the trade
While using your fingers is ok to apply your foundation often I find it doesn't really do your makeup any justice. It tends to slip off more easily probably from the excess oil from your hands and you end up re-applying it mid day. 
Depending on your own preference there are a few choices here. At the moment I am loving using my beauty blender, which is like a little egg shaped sponge which you wet then squeeze dry before applying your foundation. It gives a really even application and because of the pointed tip of the egg shape you can really get into the little nooks and cranes of your face to blend perfectly.
Other options are flat brushes or more rounded densely packed brushes. Both are great. If I had to choose it would be a densely packed rounded (Kabuki type) brush as I sometimes find the flat brushes feel too  much like a paint brush and leave foundation streaks on your face which are harder to blend in. Anyway I'll do another post about my favourite brushes again, this is just to get you started on the basics.

So go get some advice, pick up that new primer and foundation and I'll post up a "How to.." apply your primer and foundation, getting the best out of your product.

If you have any questions, comment below or follow me on my Facebook page: Kelliebbeautiful...till tomorrow!


Saturday, 20 February 2016

Makeup Haul


Ever since I was little as soon as I got something new I'd have to try it straight away. It didn't  matter if it was new clothes or toys or later makeup I had to try them there and then. My Mam still laughs at me today for it, always saying "Would you not keep it up for something special?". This coming from the woman who finds clothes with tags still on at the back of her wardrobe a year later because she totally forgot she had bought it, saving it for a 'special occasion'. I couldn't be more different when it comes to new things, I've often left a shop in the new clothes I've just bought or gone straight home and taken all my makeup off just to try out a new foundation or lipstick. Which brings me to my newest makeup haul. A great friend of mine stopped by yesterday evening with a brilliant bag of beauty goodies and so me being me had to try them straight away, well first thing this morning. I couldn't even wait to change out of my pyjama's when taking the pictures so excuse the bed hair and mismatched pjs I just wanted to share these little beauties with you as soon as I could.


Primer: L'Oreal Infallible Mattifying Base Primer
This is my first time using this product and I have to say I'm pretty impressed. It has a really lightweight texture and feels incredibly soft on application. While the finish is obviously matte it definitely does not leave your skin feeling in any way dry. In fact my face felt beautifully soft, nearly like a thin layer of silk had settled on my skin, gorgeous! This is definitely one I'll be keeping in my daily makeup bag.

Foundation: Max Factor Face Finity All Day Flawless 3 in 1 Foundation
This is a primer, concealer and foundation in one which also includes an spf20. I probably didn't need to use the L'Oreal primer first as this foundation has one built into it already but I wanted to try everything so I'm not sure if this review will give a proper reflection of this foundations priming qualities.  Usually I don't go for all in one foundations as I find them a little heavy. I prefer to build up coverage as needed. I was presently surprised by this one though. I expected the consistency to be slightly thick however once pumped out it is quite liquid which I like as a little can go a long way and allows for a more build able coverage. It has a satin finish with coverage being medium to full. The colour I used was natural 50, and I would say that it has a neutral undertone which is great because quite often I find foundations either too pink/cool or too warm/yellow. It hasn't caked on my dry patches which I find a lot of combined foundations do, this may be due to the inbuilt primer or the fact that I had primer already on my face. I think I will definitely give this foundation another go minus the primer to see if it really is as good as it seems to be on first use.

Blush: Max Factor Creme Puff Blush 10 Nude Mauve
I used this on my cheeks and along my forehead and chin to add a little warmth to my face. It's a nice neutral colour, great for an everyday makeup look. This will be great for the summer too just to dust along the face as it gives a lovely natural tanned look. I thought before I opened it that it was going to be a creme (as the name suggests) however it is a powder consistency with a matte finish. This would make a great eyeshadow base colour too.

Mascara: Maybelline The Falsies Push Up Drama 
I usually like Maybelline mascaras and have a good few of them in my kit and will probably keep this one in my kit too. This is maybe not one I'll keep in my daily bag as I'm not a fan of mascaras that have rubber or hard tips  for the brush. I much rather an actual brush bristle to really comb through my lashes. This one does however give really nice lift and coats the lashes without clumping which I find harder brushes usually do. I hate that spider leg lash look! The mascara stays put so no panda eyes mid-day so far!

Lips: Maybelline Baby Balm & Blush in Flirty Pink
I love this packaging. It's very girly and cute, as a result my two little girls have decided its theirs and not mine. I dod manage to slick it onto my lips first and dab a little on my cheeks before they got their little tiny fingers on it. First impressions, nice. It's definitely more of a balm than  lip colour, but I like than. My lips felt smooth and hydrated without being sticky. I really liked it as a blush. In general i love creme blushes and will use this again as the colour is subtle but left my cheeks with a lovely dewy glow. Lovely little multi purpose piece to keep in your bag throughout the day.


Wednesday, 17 February 2016

My Daily Makeup Essentials


I'm lucky enough to have quite a large makeup collection but I've only got one face and so many of my beautiful products go unnoticed or forgotten until I do a good clear out. Who else is guilty of hoarding their makeup or impulse buying the latest must have product?
With this in mind,  I've decided to try and declutter and work through the makeup I do have until I REALLY do need something new.  There are however must haves in my makeup bag that I really could not do without. So I've decided to share my makeup bag essentials. Seriously, I couldn't do without these beauties, they make getting ready on a daily basis super quick and easy.

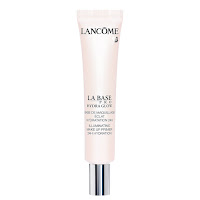
 Primer - Lancome La Base Pro Hydra Glow €36.00
This is such a beautiful primer. It leaves your skin feeling so soft, silky and luminous. I have dry combination skin and so I need a primer to even out my skins dry areas. I usually concentrate the primer around my dry patches for added moisture. This ensures my foundation doesn't dry out and flake on these areas throughout the day. It has a slightly pearlised finish to it too which peeks ever so slightly through under you foundation leaving your skin super dewy looking. It's a little expensive but really worth the investment.


Foundation - Clarins True Radiance in Nude €31.50
I've recently started using this foundation (declutter find!). I'm usually an Armani Luminous silk girl but this foundation is fab. It has a medium build-able coverage perfect for day to night wear. I much prefer to have fresh glowing skin with minimal coverage through the day but definieltly like to have full coverage when I'm going out or have a busy work schedule and this foundation really allows me to have the best of both worlds. Its silky to the touch and glides on beautifully leaving your skin looking dewy and luminous due to its light reflecting pigments. It also has spf15 essential for a daytime foundation as it protects your skin from the suns rays even in our dull Irish weather.


Concealer - Essence 16hr Long lasting Concealer - €3.99 (less than a fiver anyway!)
I use this in the lightest colour just under my eyes and on the lids. I also run it along the length of my nose and a little on my chin then blend it all in with my beauty blender. I've tried so many concealers over the years from high end to budget and this is by far my favourite. It works exactly like Touch Eclat without the price tag. Such a great little face illuminator to have in your makeup bag.


Powder - Chanel Les Beige Healthy Glow Muti-Colour N10 €49.00
I know this is a little pricey but a little really does go a long way. I've had this in my makeup bag now for over a year and have barely made a dent in it! Saying that I don't use an awful lot of powder as I have dryish skin but I do use it so set my eyes and brush it across my T-zone to stop any shine. Again this has an spf15 in it but being honest I'm not sure how much protection it would really provide from the suns rays. I think you'd want to be powdering your face all day long for it to have any effect. Aside from that I love it. Its very lightweight and almost transparent. You could also use it as a really light blush.


Contour & Blush - Urban Decay Naked Flushed Palette €31.00
My absolute favourite makeup bag essential. Its a little 3 in 1 palette which includes a contour or bronzing powder, highlighter and blush. I'm nearing the end of mine and this will definielty be on my MUST BUY list. Its really compact, so it's easy to keep in your everyday makeup bag. The contour powder is a great colour for subtle shading, while the blush is a peachy rose colour perfect for adding a little warmth to the face. And OH THE ILLUMINATOR!!! Glowy golden highlights without looking light you've dipped your face in glitter. I use this along all the high points of my face - where the sun would naturally hit. My only grip is that I wish the illuminator section was bigger and the blush smaller as I've gone through my illuminator but still have a nearly full blush section left.

Brows - Benefit BrowZings in Medium €34.00
This brow kit comes complete with tweezers (for those pesky strays!), an angled brush and shadow brush for all your brow needs. I use the wax first with the angled brush to create the brow shape that I want then fill in my pretty sparse brows using the tiny shadow brush and medium toned brow shadow, et voila done perfectly defined brows. Such a simple easy to use little brow kit, I'd be lost without it.


Mascara - Lancome Hypnose Doll Eyes Mascara €28.00
As far as I'm concerned Lancome make the best mascara on the market. I've tried hundreds of different ones and always go back to Lancome Hynose. At the moment I'm using the Doll Eyes one which I really like. The wand tapers at the end so it makes it easier to coat the really fine lashed on the inner corners of your eyes. M
ascara however is something that you probably don't need to spend a lot of money on, I just happen to love Lancome mascaras.


Lipstick - Clinique Pop, Nude Pop €19.50

As I've really dry cracked lips all year long I find this lipstick a godsend. It has a primer built into it with extra moisturising ingredients to smooth and sooth your lips. I love the nude colour too, it has a slightly rosey hue to it leaving your lips looking natural and not too made up. It has a lovely velvety finish and keeps your lips hydrated all day.

You'll notice I don't use eyeshadow or eyeliner on a daily basis as I prefer wearing those for more makeup appropriate occasions. And being honest I couldn't be bothered blending shadow and creating perfect cat eyes everyday. I just don't have the time in the morning, I just about manage to get the essentials on.
Hope this post helps you and gets you thinking about decluttering your makeup kit too.


Saturday, 13 February 2016

Is the new Barbie really representative of real life beauty?


I’m not so sure but I think it's definitely a step in the right direction. Mattel, Barbie creators have launched three new Barbie shapes which are meant to reflect a broader view of beauty. The unrealistic dimensions of the original Barbie have be replaced with a taller one, a petite sized doll and a curvy one. There are also 25 new hair style to choose from, from afro to long blue locks and 7 different skin tones. A big change up from the stick thin 18 inch waist 36 bust swan necked original. As a mother of two Barbie loving girls I have definitely welcomed this change and I’m hoping that my girls will embrace the new dolls, notice the changes and hopefully from there begin to understand that there is beauty in everyone. 
Our children learn through play, it is the most fundamental learning tool our children have. I’m hoping that by playing with a more diverse range of their favourite doll a dialog can be started about the differences between people, their looks their opinions their personalities. At the moment my children are still very young. They may not even notice the differences between people yet. Although I do know that they want to be liked and accepted by their peers. Already my three year old has asked questions about making friends. Wanting to know why such and such will not play with her in her play group or why little xxx always wants to play with her even if she doesn’t. Its heartbreaking to see your child being rejected by another child but it’s life. We’ve all been though it. I’ve tried time and time again to explain to her that she doesn't need to be everyones friend, that sometimes people are different and may not want to play with her. I want her to understand that its ok to be yourself and if someone doesn't want to spend time with her that that’s ok too, there are plenty of other people out there who would love to be her friend. 
As a mother I worry all the time about societies perception of women and beauty. Although my blog may be titled kelliebbeautiful, and the beauty industry is a place I’ve centred myself, I want my girls to learn that beauty is something that comes from within. A beautiful heart, soul and mind is more powerful than a beautiful face. Education, emotional intelligence and integrity will guide them through their lives, open doors for them and allow them to be the women they want to be. While appearance is important it should never be your raison d’รชtre.


So kudos to Mattel for their new Barbie range, a little late in the game perhaps but welcomed, especially to a mother like me.

Monday, 8 February 2016

B is for Beautiful and Botox ๐Ÿ˜Š


Sitting having coffee with some of the girls after our usual friday morning music class with our kids I announced I had to leave early. “Ooh, doing anything nice?”, they asked. “Nice?..Well if you think getting a load of needles inserted into your face to freeze it nice then yes, I’m doing something nice. Queue the puzzled looks. I was having botox done. Nice may not be the best word to use when having this procedure done but the results are nice, beautiful even.
“Why are you getting botox done, you don’t need it?”. This I’ve heard off pretty much everybody whom I’ve told I was getting botox. It dawned on me that maybe they just didn’t understand botox. Most of the girls couldn’t understand why I would want to get it done. I’m young(ish), mid thirties and not terribly aged yet, ‘yet’ being the operative word. So I set about explaining why I would want to get botox.
Firstly let me explain, botox is not a reversal procedure. It will not turn back the clock on already ingrained facial lines and wrinkles. It is a pause button. It delays the ageing process and so by doing it now I can prevent my face from becoming more wrinkled than it already is. While it does not plump out lines present at rest on the face it can help to smooth them out a bit. 
A few puzzled faces still looked back at me in the cafe, some nodded in agreement some maintained I didn’t need it but each to their own and all that. So I left saying I’d be back to prove myself right next Friday with a fresher face.
I’ll admit this is not my first encounter with botox, I’d had it done last year and was pleased with my results. For some reason though this time I was a little bit more nervous. I think it was the fear of pain. I was so nervous the first time I got it done my whole body was tense which made the supposedly painless procedure quite painful. I can still hear the noise of my skin popping when the needle was inserted, I’m not sure that noise will ever leave my memory.
This time however I was going to a different clinic and seeing a different Dr. A Dr. I’d wanted to see for a very long time now. I’d heard nothing but great things about Dr. Lalloo and I’d seen his ‘work’ on a few faces and knew that I was going to be in the best hands possible.
Battling the M50 traffic on a very wet and stormy Friday afternoon I arrived at the Primary Care Centre in Blanchardstown. Dr. Lalloo’s clinic, Cosmedics, was located on the second floor, so up I went, waiting a minute or two before Dr. Lalloo appeared. If I’m being honest I greeted him with a false bravado. I may have been smiling on the outside but honestly my heart was about to jump out  of my chest. Should I make my excuses, say I felt unwell? Maybe the girls were right, I really didn’t need botox, I could just head home…but my feet kept on following him. 
He took me through to one of the therapy rooms and began asking the important ‘WH’ questions, “Why did I want botox?”, “Where did I want it?”, “Did I understand the process?”. He examined my face explaining where I might benefit from the toxin, he also pointed out where I might benefit from a filler. “Filler??!!!”. Oh god this is not something I signed up for. Surely I don’t need fillers? Do I?. Facing the mirror Dr. Lalloo showed me where there had been some hallowing under my eyes. I admit I had noticed this myself over the last year or so. I wasn’t sure though whether it was just from tiredness and kids or from gaining and losing weight over the course of my pregnancies. It wasn’t something that really bothered me, but now that it had been pointed out to me and I was getting the opportunity to do something about it maybe I should. 
Again let me explain the filler Dr. Lalloo was suggesting was for under my eyes. The dark hallows that most of us get as we get older. I had done a little research on this before, I knew that it filled the area called your tear trough. It could plump up the skin reducing the hallowness and therefore reverse the signs of ageing by a couple of years. 
After a further twenty minutes of explaining the the pro’s and of course the possible con’s of both procedures I decided to go for it. Despite my earlier hesitations I really wanted the botox, my laughter lines had really started to become more noticeable and the lines on my forehead were beginning to become a permanent fixture as were my 11 lines or Glabella, the frown lines between the brows. The filler I was a little more apprehensive about. Would it be painful? Would I end up looking like I had something done to my face. I really didn’t want to change my appearance, I’m happy enough with it, I just wanted to freshen myself up a bit. Dr. Lalloo assured me that I would look no different than I do now except maybe a few years younger. He told me that by filling the tear trough my cheekbones would be slightly raised, in turn lifting the naso-labial lines (those lines from your nose to the corners of your mouth) which would instantly give me the appearance of a more youthful face. I was sold. I also knew that any work that was going to be done on my face would in time fade so if I was unhappy with anything it wouldn’t be permanent. Probably not the best argument for getting it done but it made me more comfortable going ahead with it.

Once all the consent forms were read and signed it was show time. ‘Before’ pictures were taken so I could compare the results once he was finished. I lay back in the chair where Dr. Lalloo began firstly with the botox. I shouldn’t really be calling it botox. Botox is a brand name like hoover is to vacuum. Instead Dr. Lalloo used a toxin called Dysport. Kinda like the Dyson vacuum of toxins. Enough with the vacuum analogies, the toxin he was using like everything that he uses is the best out there, FDA approved and most importantly totally safe (well as safe as a toxin can be). 
He started on my forehead, explaining exactly why he was inserting the toxin where he was and the reasoning behind it. It all made perfect sense to me then and I really was listening but for the life of me now I can’t remember exactly what he said and so don’t want to bore anyone with the finite details. Let’s just say he really knows what he is doing. I felt little or no pain. This was my biggest worry about getting it done, and here I was feeling relaxed and excited now to be getting it done. I think what helped though was his manner. Every time he inserted one of the needles he said “Good for you”. And I thought, ‘yeah, good for me, thanks Doc, I’m coping with this really well.’
Forehead done and onto the filler. He had said that this may be a little uncomfortable. He used the word sting actually. But again a “Good for you” from him and it was done. I couldn’t believe it. That was it? Honestly, no pain, not really, just a little pinch. I couldn’t wait to look in the mirror. The big reveal!! Oh, I look like me. Just a slightly better me, younger maybe, definitely. A pre kids me I think. Happy days.
After photos were taken, we went to his office to take a look at the pictures so I could compare the results. We both looked at the before and after pics and both struggled to pin point the exact reason why the girl on the right looked better than the girl on the left. The changes were so sublet yet striking. My eyes looked less tired, my smile brighter and cheekbones just a little fuller but I really couldn’t point to a specific change in my face. I just looked great, well for me that is.
The real test would be if my husband could tell the difference. Dr. Lalloo did explain that while the fillers are instant the botox/toxin can take up to two weeks to really settle in with results lasting up to five to six months. Usually first time botoxer's can see the results last up to four months but would need a top up after that. As it was my second time getting it the results should last slightly longer.
I left the clinic feeling grateful. Grateful for the opportunity to have this treatment done, grateful to Dr. Lalloo for putting me at ease while still being reassuringly professional and grateful that all went well.
I couldn’t wait to get home and show off my face. Would anyone notice? I was hoping that they did, as in they thought I looked well, not as in, omg do you get your face done? A week on and thankfully its been the latter. Everyone has commented on how fresh I look, asking whether I’d had my hair done or changed my makeup. While some knew I’d had this done others didn’t and it was their comments that I was really interested in. 
Would I recommend it? A big yes. I had drinks with a girlfriend the other night who didn’t know I’d had it done who said I was looking well. I excitedly told her what I’d had done, I think I may have sowed a little botox seed in her head. 
While I would definitely recommend having this procedure done to anyone who has thought about it but just hasn’t made up their mind, I think it’s important to point out that you should really do your homework. Make sure you research the different types of toxins out there. Only go to a registered doctor. The toxin used is powerful and should only be administered by a trained professional. Know that not every doctor is going to yield the same result. Look for someone who has a strong aesthetic history, who understands the intricate dimensions of the face and the effects of beauty on the face. Ask people who’ve had it done are they happy with their results. And run a mile when you see salons offering too good to be true knock down prices on botox. It’s just that, too good to be true. Quality should be at the forefront of your mind when having any chemical inserted into your body. 

I had the Dysport toxin inserted into three areas of my face. My forehead, my 11 lines and my laughter lines ,the cost of this was €425.00 with the cheek filler costing €350. Not cheap I know but Dr. Lalloo did not charge me extra for his time and so offered me the toxin and filler at a reduced rate of €650.00. This price I know is defiantly not the cheapest on the market but as I said before spend your money wisely. I knew I was in the best of hands with Dr. Lalloo, I’d done my homework and was more than happy to have him carry out the procedures knowing that the quality of the product he used was the best on the market. His knowledge and precision can also not be measured monetarily. 

I am now happy with the face that looks back at me in the mirror. Don’t get me wrong I wasn’t unhappy before just a little weary of the forever tired face staring back. I’m glad I did something about it and hopefully this helps anyone who may be thinking of getting it done themselves.

Tuesday, 2 February 2016

Beautiful Below


While the bush may have been back last Summer its revival has been short lived. Prepare for landing as all things Brazillian are having a major come back. 
To ensure maximum comfort during your wax there are a few tips and tricks you can do before and after to get the best results.
Tip 1 Exfoliate. The day before you plan to get waxed, exfoliate in the shower, try Lycon's Anti-Bump foaming gel (€15.00). This will remove any layer of dead skin allowing the wax to grip better to short hairs.
Tip 2 Plan to wax after your period. You're more sensitive to pain on the run up and during your period. Do yourself   a favour and get a wax the week after, your pain threshold is much higher.
Tip 3 Take and over the counter pain reliever. About an hour before your appointment take a Paracetamol or similar to take the edge off.
Tip 4 Breathe. Sounds simple but many of us hold our breath when getting waxed. Breathing in and out helps reduce the pain.
Tip 5 Cough. When the therapist is about to pull off the wax turn your head and cough, it distracts you from the pain.
Tip 6 Apply a cooling, soothing after lotion such as tea tree lotion, it's antiseptic properties will help stop any inflamed bumps.
Tip 7 Wear loose fitting clothes, so no skinny jeans or thongs ladies, friction will cause ingrown hairs and bumps. Try Hair on Strike to reduce hair growth and minimize any lumps and bumps (€12.50).
*Most of the mentioned products can be bought in any good waxing salon.

One day at a time

So it's been a while since I've posted anything here, my intentions were to have at least two posts up a week when I first started however circumstances have changed. As you probably know I've been a stay at home mam for three years now. Which I absolutely love, but I also was loosing my mind a bit due to lack of exercising my brain! Please tell me I'm not the only mam who feels like this? Anyway I decided to do something about it. I think I was sick of listening to myself complain about all the things I wanted to do but never seem to actually do, I'm sure my husband was too. 
There was always and excuse, but valid ones, I've a two and a three year old they are my priority, always. But, I suppose there comes a certain point when you need to start thinking of yourself or else you're just not going to be the best that you can be for your kids. Thats what I felt anyway. 
My background is teaching children with Autism. Something that I've done for nearly eight years. I've loved and loathed it at times. It can be very challenging but is most definitely one of the most rewarding things I have ever done with my life bar having my children and marrying my husband. That being said I felt I need a new challenge in my life. I've always had a little childhood dream of writing a book or being a journalist but never really focused on this when I was in school. My aim was to go to College and get a degree to make my parents proud. Stupidly, I never really thought about what I really wanted to do and so ended up getting an Arts degree from UCD. Which I'm proud of, but honestly have never used! 
I'm lucky enough to have brilliant family around me and it was talking to my two sisters in law who are writers and in the beauty industry that made me really think about what I wanted to do. I've always loved fashion and makeup like many other woman out there but never really thought that it could be a career option. It's such a hard industry to crack and I really had no skill sets matching it anyway. But I knew I needed to be refreshed and inspired, enjoy what I do not begrudge it. Talking with them really helped me understand this and they encouraged me to write. Small things at first, like choosing my favourite lipstick and writing why I loved it so much. Sounds easy but every time I put pen to paper my mind froze. Maybe I just wasn't cut out to write after all. After hours of agonising about why my favourite lipstick was my favourite and only two short paragraphs about it later I sent it over to one of the said sisters-in-law and anxiously waited on her reply. Would she think it was a load of crap, 'cause I did? Surprisingly she loved it and set me about writing little articles for her here and there. Simple beauty based articles on how to get a certain makeup look or who wore their hair best at a certain awards party. It took me hours to write each one but as the weeks went by my confidence started to grow as did, I think, my writing skills. I now knew I could write, it may not be hugely meaningful to many but to me it meant my confidence, my identity and self esteem was returning. Amazingly some of my articles even got published verbatim in some of the red top weekend magazines. I could not have been prouder of myself to see my very own words in print.
 It was then I decided to start my blog. Again, this was something that I'd been putting off for ages, always saying I needed someone to set it up for me, hold my hand through the process, more excuses. I realise now it's fear of the unknown, feeling I needed my hand held when really I am capable of doing it myself, I was just scared. So one evening I set it up. I know its not the best looking blog page in the world but its mine and I did it myself and I'm glad I did. 
As I said before my intentions were to really get things going with the blog, review beauty products, write long and witty insightfully posts about my lifestyle and travels etc. Then it kind of hit me again, that self consciousness, doubt began creeping in. Who do I think I am? Who wants to hear what I have to say? I'm sure people have much better things to be doing with their time than sitting and reading my take on trivial beauty trinkets and my trips to Tescos. Once again, I felt a bit deflated and once again my family picked me back up. 
As I had been writing about makeup and how to apply it I felt I needed a little more knowledge about the subject. Don't get me wrong I've always been able to apply my own make up and think I'm not too bad at it, but knowledge is power and a little education never hurt anyone. 
I decided to retrain and become a makeup artist. So off to college twice a week in the evenings for four months. Hesitant at first I must admit, however a friend did the course with me and so that made things so much easier. By the end of the first class I had images of me being the next Lisa Eldridge or Pixiwoo. As time went on I realised that yes I actually am good at this (validated by the fact I came top of my class, sorry for the gloat!) however this is maybe not exactly what I want to do. 
During the course another opportunity arose and I began working in PR, just freelance back office stuff but learning a lot from someone well respected in the PR and fashion industry. A few weeks in and I realised I was doing too much. Full time at home with the kids, working 20 hours a week freelance with no childminder, therefore no actual working hours. I just had to work whenever the kids slept and then all weekend, which really wasn't what I wanted either. On top of that I was at College two nights a week with homework and exams. Then Christmas came, dinner in my house Christmas day and then another full house St. Stephens Day as much as I enjoyed it, I'd had enough. January came, College finished, I hired a part time childminder two days a week. Work is under control, however I'm definitely still learning about this PR thing. But luckily I now have a little free time to rekindle my relationship with my blog. Hopefully I can keep up with it, but if not, forgive me, I'm a part time working mammy with a full time desire to be my best.