


So far if you've been following the last three posts on becoming your own MUA you'll have learned to prep and prime your face ready for foundation. Applied your foundation understanding the rules for colour matching and choosing the right foundation for your skin type. Also you'll have learned to apply the correct type of concealer for different areas on your face and where to apply your liquid concealer to highlight and reshape your face. And finally you should now have the tools to identify your face shape and use and apply a contouring shadow and blush. It's time to perfect those brows.
This is a tricky one, there are so many brow kits and tools on the market these days you can become bamboozled with the choice and end up using something that doesn't necessarily work for you. You may also be in one camp or the other, meaning full on HD type brows or natural feathery brows. For me it changes form one situation to the next. During the day I like to have a more natural looking brow using minimal product with minimal effort. If I have something on or am going on a night out I like my brows to be more defined.
Getting this right is so important. Your brows not only frame your face but they are important for communication and the revelation of your emotions. A great option for those of us who find it difficult to tame our brows is to get them shaped and tinted professionally, this will make it a lot easier to maintain them at home. A professional will also be able to advise you on the correct brow shape for your face, something a lot of us get wrong by either arching our brows too high or removing far too much hair than is necessary.
For a more natural day time look I often use a brow pencil. Be careful when choosing the shade though. I have fair to medium brows but find brow pencils for blonde hair often have a reddish tone to them which just doesn't suit me. A great all round shade which suits most Irish skin tones is taupe or hazel. Never ever use black, nobody's brows are truly black, if you have dark brows use a dark brown pencil. For my daytime brow I use Max Factor brow pencil in hazel which is only €7.49 in Boots. But my all time favourite brow pencil has to be Tom Ford Brow Sculptor in Taupe which is arguably less affordable at €45.00 from Brown Thomas, but it does last a very long time. It has an angled point which you twist up to refresh so you don't need a parer handy (something I can never find!).
I'll do a tutorial on more dramatic brows soon, but for now mastering a daytime brow is the first step. Excuse the pictures it's been one of those days!
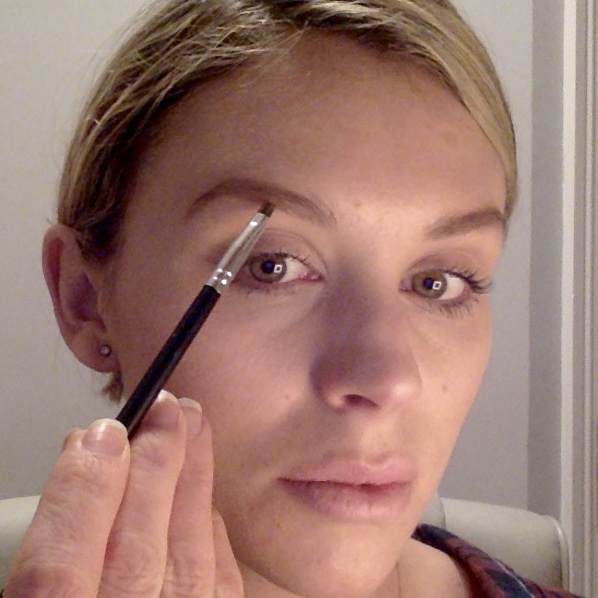
Step 1 Place a brush along the side of your nose to find where your brows should ideally start.

Step 2 Angle the brush from the outside of your nose to the outer corner of your eye to find where your brows should ideally end. The end of the brow's point should be at a 45-degree angle from the outside end of the eye.

Step 3 Brush brows up with a spoolie brush. This helps you to see the shape you like and to see where they are uneven.

Step 4 Using short dash-like strokes to mimic your natural hairs, softly fill in any sparse areas with a pencil. Choose the colour that best matches your brows and fill in really lightly so it's barely there.

Step 5 Use an angled brush and a similarly colored pressed powder to define the shape of your brows even more. The goal is to really have the most even brows, but try not to overly fill in the inside corners of the brows or make the end points too harsh. Your brows are naturally darker at the outer parts so start filling in from the outside in without picking up anymore product on your brush.
Step 6 Brush through brows again with a spoolie to blend out the color and soften any harsh lines

Step 7 To set the look and hold the hairs in place, comb through brows with a coloured or clear brow gel. Or alternatively spray a little hairspray onto your spoolie brush and comb through, works for me.

Step 8 Using your small concealer brush apply a thin line of liquid concealer under the brow, this will make the edge look sharp and clean. Set with some translucent powder.
No comments:
Post a Comment